Introduction to Soft Mints recipe
What Are Soft Mints?
Soft mints recipe are delightful confections with a tender, melt-in-your-mouth texture that distinguishes them from traditional hard mints. These pillowy treats deliver a refreshing burst of flavor while maintaining a gentle consistency that makes them perfect for after-dinner enjoyment. Moreover, they combine cooling mint sensations with balanced sweetness for an irresistible treat.
The charm of a homemade soft mints recipe comes from its remarkable simplicity. Using just a few pantry staples, you can create these elegant confections that rival commercial versions in both flavor and texture. Furthermore, these timeless treats have graced dessert trays for generations, bringing their refreshing character to countless gatherings.
Why Make Soft Mints at Home?
Creating soft mints in your own kitchen offers several compelling advantages. First of all, you gain complete control over ingredients, eliminating the artificial preservatives and colors found in store-bought versions. Additionally, homemade versions can be adapted to accommodate dietary preferences or restrictions.
The process of making a soft mints recipe from scratch delivers immense satisfaction. There’s genuine joy in transforming basic ingredients into something special through your own efforts. Besides, the technique is surprisingly approachable, requiring no specialized equipment or advanced cooking skills.
Homemade mints also represent excellent value. With the cost of a small package of premium mints, you can produce multiple batches at home. As a result, they make thoughtful gifts when presented in decorative packaging, offering a personal touch that mass-produced options cannot match.
Ingredients You’ll Need
Key Ingredients for Soft Mints
Every successful soft mints recipe begins with quality ingredients. The foundation consists of powdered sugar (confectioners’ sugar), which provides both sweetness and the characteristic texture that defines these treats.
Cream cheese contributes essential richness and subtle tanginess that balances the sweetness perfectly. For optimal results, use room-temperature full-fat cream cheese for smooth integration. Meanwhile, a modest amount of butter enhances the melt-in-your-mouth quality that makes these mints so appealing.
The signature flavor in any soft mints recipe comes from mint extract. Pure peppermint extract offers the most authentic taste, though spearmint makes an excellent alternative. Furthermore, a pinch of salt enhances the overall flavor profile, while optional food coloring can add visual appeal.
Basic ingredients list:
- 4 cups powdered sugar, plus extra for dusting
- 3 ounces cream cheese, softened
- 1 tablespoon butter, softened
- ½ teaspoon peppermint extract
- ⅛ teaspoon salt
- Food coloring (optional)
Optional Ingredients and Flavor Variations
The traditional soft mints recipe serves as a wonderful starting point for creative variations. For instance, you might experiment with different extracts alongside or instead of mint. Consequently, flavors like vanilla, lemon, or even lavender can transform the basic recipe.
Chocolate lovers might incorporate cocoa powder by substituting ¼ cup of the powdered sugar with unsweetened cocoa. In addition, finished mints can be dipped in melted chocolate for an indulgent twist on the classic recipe.
For special occasions, consider these creative additions:
- 1-2 tablespoons crushed candy canes for holiday mints
- ½ teaspoon citrus zest for bright, aromatic mints
- ¼ teaspoon culinary lavender, finely ground, for floral notes
- ½ teaspoon vanilla extract paired with mint for depth of flavor
Step-by-Step Guide to Making Soft Mints
Step 1: Prepare Your Equipment
Before beginning your soft mints recipe, gather all necessary tools: a medium mixing bowl, electric mixer, measuring cups and spoons, spatula, and baking sheets lined with parchment paper. Additionally, a small cookie scoop or teaspoon will help create consistent mints.
Clean and dry all work surfaces thoroughly, as soft mints easily absorb moisture and flavors. Subsequently, if you plan to roll and cut the mints, dust your work surface and rolling pin with powdered sugar to prevent sticking.
Allow cream cheese and butter to reach room temperature approximately 30 minutes before starting. As a result, they’ll blend more smoothly with other ingredients. Meanwhile, ensure your hands are clean when it’s time to handle the mint mixture.
Step 2: Mix the Ingredients
Creating perfect dough for your soft mints recipe requires attention to mixing technique. To begin, beat softened cream cheese and butter until completely smooth and fluffy, about 2-3 minutes. Consequently, you’ll have a creamy base that ensures silky-textured mints.
Next, add peppermint extract and salt, then mix briefly. After that, gradually incorporate powdered sugar one cup at a time, mixing on low speed between additions to prevent mess. Once all sugar has been added, increase to medium speed and beat until the mixture forms a soft dough.
The ideal soft mints consistency resembles play dough—pliable but not sticky. If too soft, add more powdered sugar a tablespoon at a time. Conversely, if too dry, a few drops of water will help achieve the proper texture. Finally, if using food coloring, add a few drops and knead until evenly distributed.
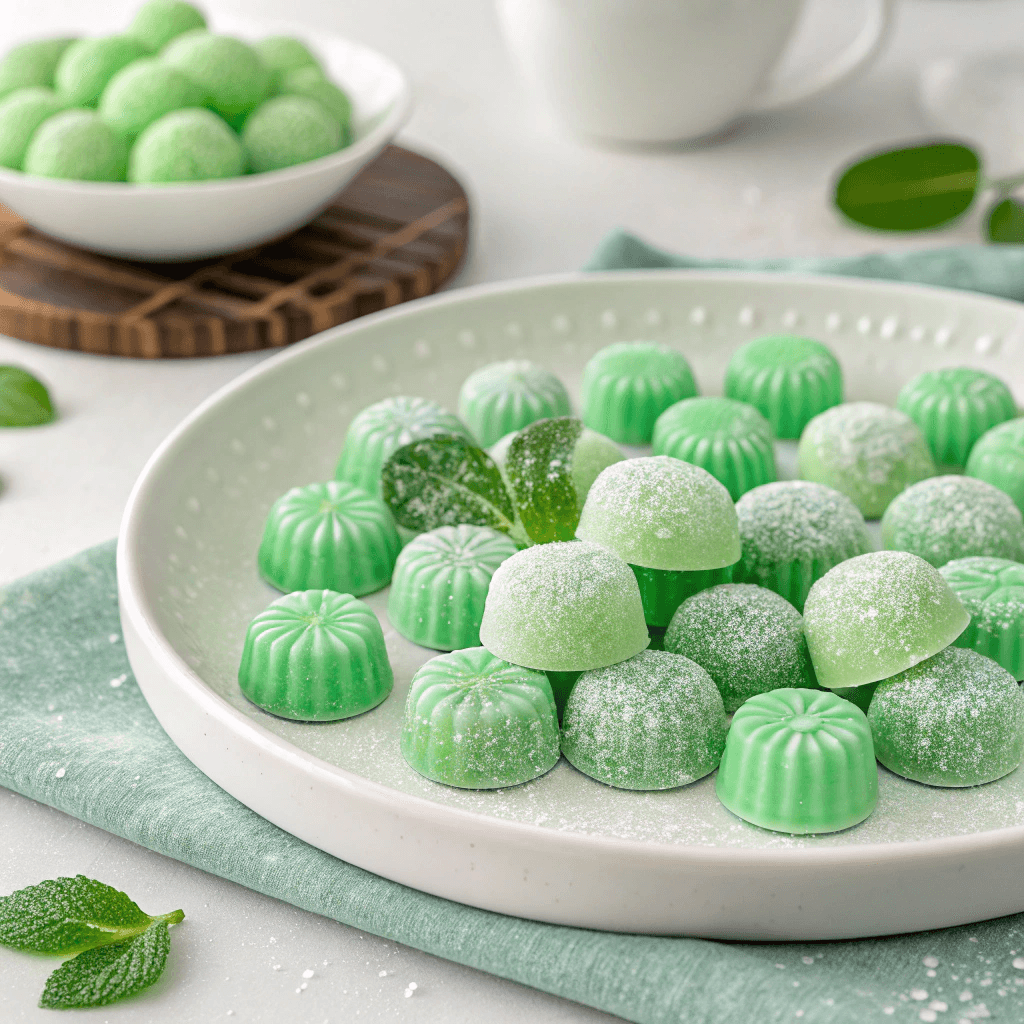
Step 3: Shape the Mints
Shaping transforms your soft mints recipe into finished treats. The simplest method is rolling the dough into logs about 1 inch in diameter, then slicing into ¼-inch thick rounds with a sharp knife.
Alternatively, try the traditional approach for soft mints. Pinch off marble-sized pieces of dough and roll them into balls between your palms. Subsequently, flatten each ball slightly with your fingers or the bottom of a glass dipped in powdered sugar. For decoration, gently press the tines of a fork into the surface.
For defined shapes, roll the dough to approximately ¼-inch thickness on a powdered sugar-dusted surface. Afterwards, cut shapes using small cookie cutters or the rim of a shot glass. Moreover, dip your cutter in powdered sugar between cuts to prevent sticking. Finally, transfer shaped soft mints to prepared baking sheets, allowing space between pieces.
Step 4: Let the Mints Dry
Proper drying is crucial for any soft mints recipe. Place shaped mints in a cool, dry location with good air circulation. Additionally, keep them away from direct sunlight, which can affect both color and texture.
The drying period for soft mints typically ranges from 24-48 hours, depending on size and humidity levels. During this time, they develop a slight crust while maintaining their soft interior. Furthermore, flip them halfway through the drying time for even results.
Patience yields the best results with your soft mints recipe. Although sampling immediately is tempting, allowing the full drying time ensures ideal texture and flavor development. After about 24 hours, test a mint by touching it gently—it should feel firm outside but yield slightly when pressed.
Step 5: Store Your Soft Mints
Proper storage preserves the quality of your soft mints recipe creations. First, ensure mints are completely dry before storing. Subsequently, place them in airtight containers with layers separated by parchment or waxed paper to prevent sticking.
Keep soft mints away from strongly aromatic foods since they easily absorb odors. Moreover, store in a cool, dry place rather than the refrigerator, as moisture can alter their texture. Under optimal conditions, these treats maintain quality for up to three weeks, though their flavor is most vibrant in the first week.
For gifting your soft mints recipe creations, consider creative packaging options such as vintage tins, decorative jars, or cellophane bags tied with ribbon. Additionally, including flavor information and a “best enjoyed by” date adds a thoughtful touch to your handcrafted gifts.
Common Mistakes to Avoid When Making Soft Mints
Mistake #1: Overmixing the Ingredients
A common pitfall when preparing a soft mints recipe is excessive mixing, which leads to tough texture. While thorough incorporation is important, once powdered sugar has been fully mixed in, limit additional beating to maintain tenderness.
Signs of overmixed soft mints dough include stickiness or elasticity. Consequently, if you notice these qualities, resist adding more powdered sugar, which might worsen the problem. Instead, let the dough rest for about 15 minutes before shaping.
To achieve perfect soft mints, mix only until ingredients form a cohesive dough. Furthermore, consider using a spatula for final mixing rather than continuing with the electric mixer. As a result, you’ll maintain better control and achieve ideal texture.
Mistake #2: Not Letting the Mints Dry Long Enough
Rushing the drying process compromises soft mints recipe results. Without adequate drying time, mints won’t develop their characteristic texture—slightly firm outside with a tender center. Moreover, insufficiently dried mints often stick together during storage.
Success with soft mints requires patience during this critical phase. While packaging them after just a few hours seems tempting, resist this urge. Therefore, always follow the recommended drying time of 24-48 hours, even when mints appear ready sooner.
Mistake #3: Using Too Much Powdered Sugar
Although powdered sugar is essential in a soft mints recipe, excess amounts create overly sweet, chalky mints. Additionally, too much sugar makes dough dry and difficult to work with, resulting in cracks and poor texture.
When adjusting consistency, add extra powdered sugar sparingly, a tablespoon at a time. Subsequently, mix thoroughly before evaluating whether more is needed. Remember that dough firms up slightly from the warmth of your hands. Furthermore, adding sugar is easier than correcting an overly dry mixture.
Nutritional Information on Soft Mints
Understanding the nutritional aspects of your soft mints recipe supports mindful enjoyment. Typically, three homemade soft mints (approximately 1 ounce) contain about 110-130 calories, primarily from carbohydrates. Additionally, there’s a small amount of fat (2-3 grams) from cream cheese and butter, with minimal protein.
Soft mints contain negligible fiber and few micronutrients, though they provide quick energy through their sugar content. Furthermore, homemade versions generally have fewer artificial ingredients than commercial alternatives. Nevertheless, enjoy them in moderation within a balanced diet.
For dietary adaptations, soft mints recipes can be modified using plant-based cream cheese and coconut oil for vegan versions. Moreover, reduced-sugar variations using alternative sweeteners are possible, though texture may differ. Additionally, traditional soft mints are naturally gluten-free, making them suitable for those with gluten sensitivities.
Frequently Asked Questions (FAQs)
What is the best way to shape soft mints?
The ideal shaping method for your soft mints recipe depends on your preferences and occasion. For efficiency and consistency, try rolling the dough into logs and slicing. On the other hand, hand-shaping individual mints allows for creative control and charming homemade appearance.
When precision matters for your soft mints, consider small silicone molds. First, dust molds lightly with powdered sugar to prevent sticking. Subsequently, press portions of dough firmly into each cavity. Additionally, tapping the mold gently on the counter helps eliminate air bubbles.
For special occasions, emboss your soft mints recipe creations with decorative stamps or patterned glasses. Furthermore, try layering differently colored doughs for striking two-toned effects that add visual interest to your presentation.
How long do soft mints last?
Properly stored homemade soft mints typically remain at peak quality for 2-3 weeks at room temperature in airtight containers. During this time, they maintain their distinctive texture and fresh flavor profile. However, ingredients and storage environment can influence this timeframe.
Signs that your soft mints have declined include hardening, color changes, or off-odors. Additionally, moisture droplets inside storage containers indicate potential spoilage. For this reason, check stored mints periodically, especially in humid climates.
To extend your soft mints recipe treats’ shelf life, freeze them for up to three months. First, ensure they’re completely dry, then layer between parchment in airtight containers. Subsequently, thaw frozen mints at room temperature for several hours before serving. Nevertheless, texture may differ slightly after freezing.
Can I add different flavors to the mints?
The versatility of a basic soft mints recipe welcomes flavor experimentation. Beyond traditional peppermint, try spearmint, wintergreen, or non-mint options like lemon, orange, or vanilla. Additionally, combining complementary flavors creates sophisticated profiles.
Natural flavoring options for soft mints include citrus zests, finely ground dried herbs, or tea powders. For instance, adding lemon zest to lemon-extract mints intensifies citrus character naturally. Furthermore, a pinch of ground culinary lavender creates beautifully aromatic floral mints.
When adapting your soft mints recipe, start with small amounts of new flavors before committing to full batches. As a guideline, non-mint flavors often require 25-50% more extract than mint varieties for comparable intensity. Moreover, remember that some flavors strengthen during drying, particularly those from volatile oils in citrus or herbs.
Conclusion
Mastering homemade soft mints opens a world of possibilities for treats that surpass commercial versions in both flavor and quality. Throughout this guide, we’ve covered every aspect of crafting the perfect soft mints recipe—from essential ingredients and techniques to troubleshooting and creative variations.
The joy of making soft mints at home comes not only from their delightful taste and texture but also from the satisfaction of creating something special from simple ingredients. Moreover, these versatile confections adapt beautifully to seasonal celebrations, personal preferences, and dietary needs. As a result, they’ve earned their place as beloved treats that impress friends and family.
We encourage you to experiment with your own soft mints recipe variations, perhaps incorporating unique flavor combinations or decorative techniques. After all, the most memorable culinary creations often begin with classic foundations that are thoughtfully personalized. Meanwhile, remember that practice leads to perfection, so embrace the learning process as you develop your mint-making expertise.
For more delicious mint-based recipes, explore these expert mint dessert collections that showcase this versatile flavor in everything from ice cream to chocolate treats.
and for mroe recipes you can finde it in our website globalyrecipe.us


